Here we have a pretty typical-looking set of columns: Received, From, Subject, and a smattering of icons for high-priority items, attachments, and so on. Let’s say you want that Received column to be the very first one on the left, and all the icons to be grouped on the right. A few simple drags and drops will do it all! Just grab the column you want to move by putting your mouse over it and holding down the left button on your mouse. When you move the column, two red arrows will appear on either side, like this:
And once you’ve dragged and dropped all your icons into a group, it will look like this:
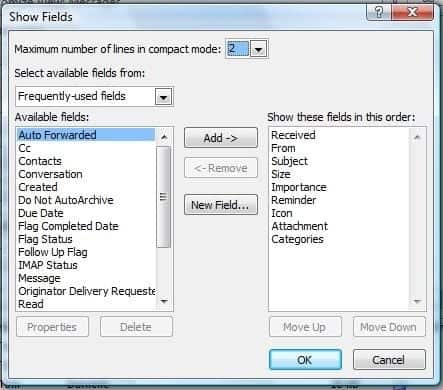
If you don’t want to drag and drop, you can also reorganize your column headings by right-clicking on any of the column headings and selecting Customize Current View. Then select Fields, which is the top button on the next screen. That will take you here:
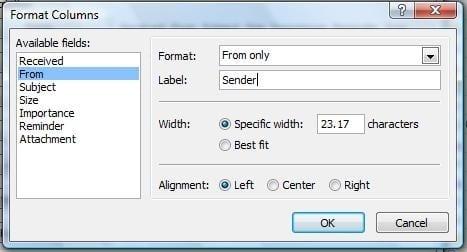
Now you can select from the Available Fields list to add column headings, or you can select them from the area titled “Show these fields in this order” to remove them. You can re-order by dragging and dropping in the right-hand box. Now let’s say you’re fine with the fields you’re using—you just don’t like what they’re called. Maybe you want to change “From” to “Sender”. It’s easy to do! Right-click on any column. Go to Customize View and select Format Columns. Select “From” in the Available Fields section, and in the Label area type in the new label you want. Here, we’ve typed in “Sender”.
Click OK, and then OK. Your new column headings will look like this:
Speaking of email…has your business had trouble with spotty email availability, remote access, or spam? Depending on your size and setup, either a hosted email solution or an in-house email server might make sense for you.


